Custom Fields
Learn how to create a custom field on specific invoices.
In Fenerum, you can add a custom field. Custom fields on invoices can be incredibly useful for adding specific information unique to your company or relevant to the transaction. These fields can vary greatly depending on your needs and the nature of your business.
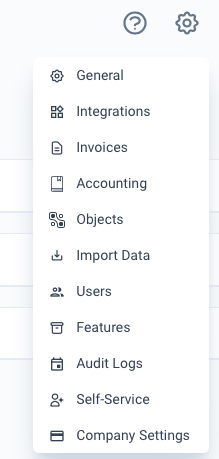
To create a custom field, go to settings by clicking the gear icon in the top right corner, then select "Objects." Here, you can add a custom field at the Account, Subscription, and Invoice line levels.

Determine the Placement of the Custom Field
Account - If you want a custom field in the invoice header, click "+ Add custom field" next to Account.
Subscription - If you want a custom field to appear under the description in the invoice line, click "+ Add custom field" next to subscriptions.
Invoice Line (Pending Charges) - If you want a custom field to appear under the invoice line on a Pending Charge, click "+ Add custom field" next to invoice line.

Add a Custom Field
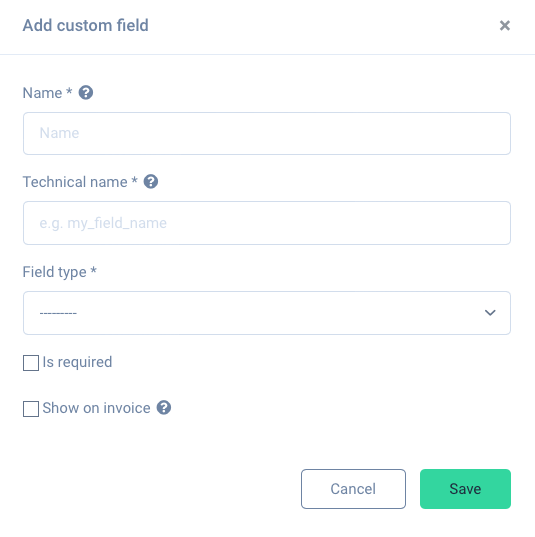
After that, you have the option to define your custom field with the following values:
- Name - The name that will appear on the invoice.
- Technical name - The name of this field used in the API. It consists of letters, digits, and underscores instead of spaces.
- Field Type - Here you can specify the type of the field, e.g., Yes/No, Text, Date, etc.
- Is required - Decide whether the field must have a value or can be left empty.
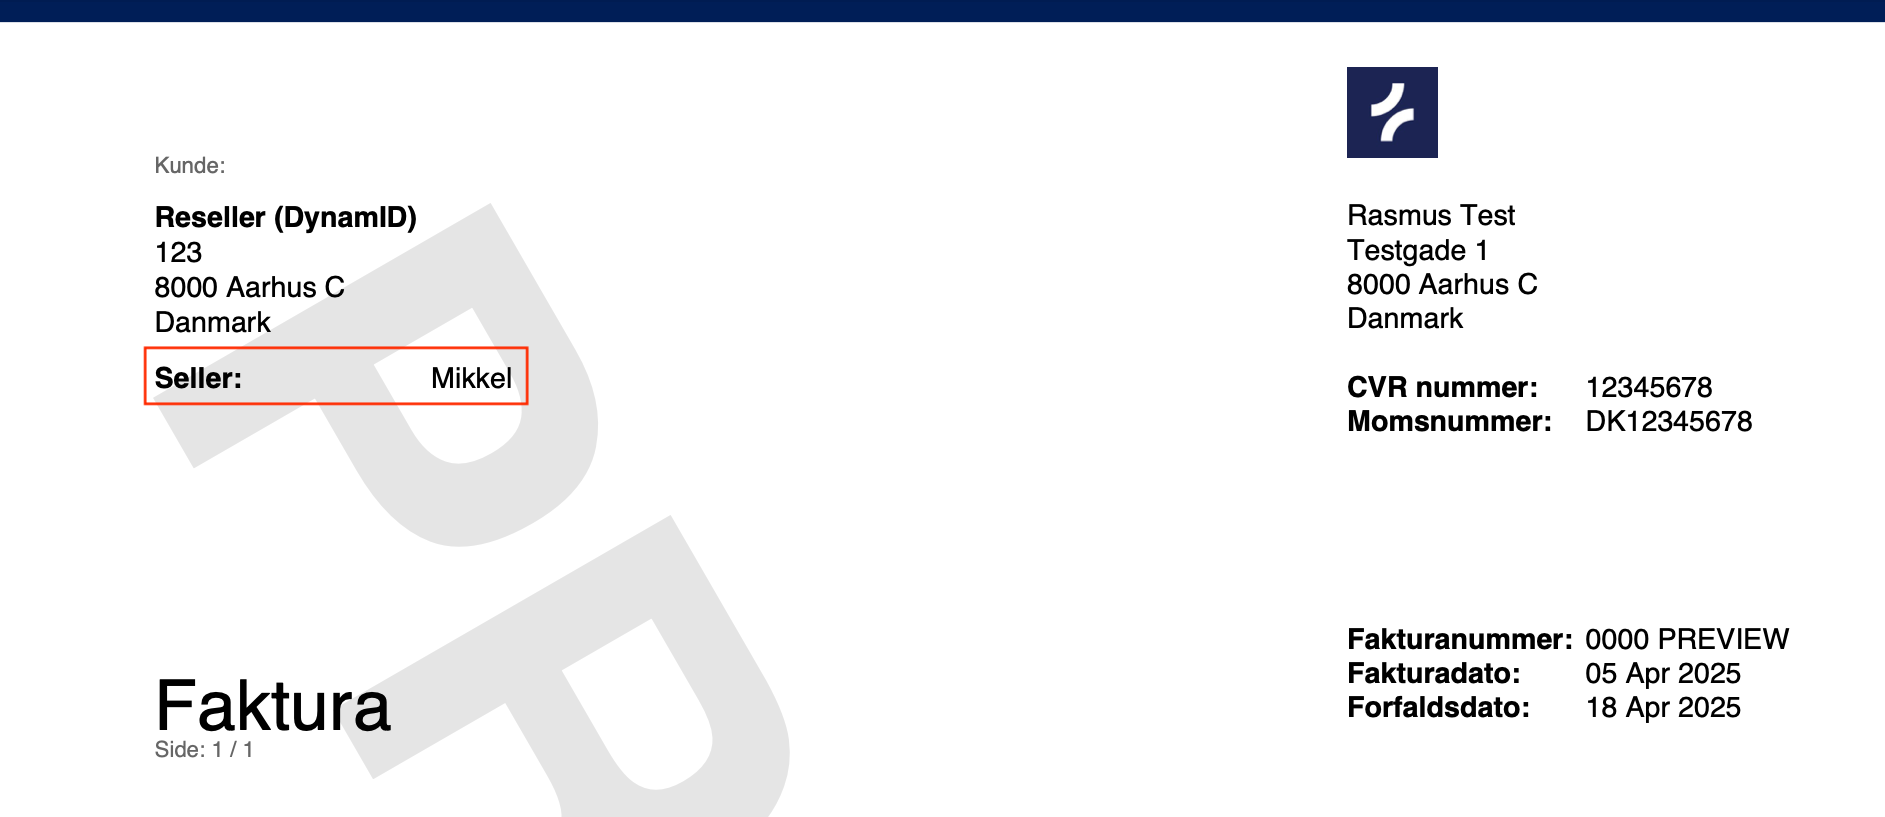
- Show on invoice - If the field should be displayed on all invoices when a value is specified, enable "Show on invoice."

Example of Using a Custom Field
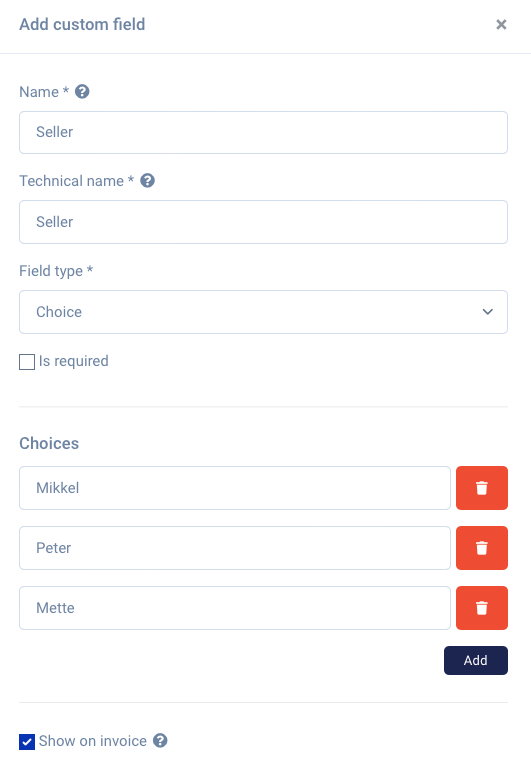
An example of a useful custom field for the invoice header could be the salesperson's name. This will make it easier for the buyer to identify and contact the salesperson.
- Click on settings (the gear icon in the top right corner).
- Click on "Objects".
- Click on "Account".
- Click on "+ Add custom field".
- Fill out the form with the necessary information.

- Go to the customer to whom you wish to add a custom field.
- Click on "Edit Account".
- Scroll down to the "Seller" field.
You have now added a custom field to an Account. 
