Expense management in Fenerum
Beta feature
This feature is currently in open beta. Please test these features on dedicated test account before using them on a production account.
Fenerum can manage two types of expense documents:
- Receipts for expenses which were already paid
- Invoices for expenses where you already got the invoice, but it has not been paid yet
Documents can be uploaded to Fenerum in two ways. You can upload them via
Fenerum Web UI (Drag and drop) or you can send them to proper e-mail address.
E-mail inbox
As flow for this two types of documents is a little bit different Fenerum provides two separate e-mail addresses for them.
Addresses are auto-generated by Fenerum and cannot be changed. If you want to use e-mail address in your own domain please setup e-mail forwarding on your e-mail inbox. Please contact your e-mail provider for information how to set it up.
Your inbox addresses will look like that:
receipts@<organization-code>.fenerum.com for receipts
pay@<organization-code>.fenerum.com for invoices
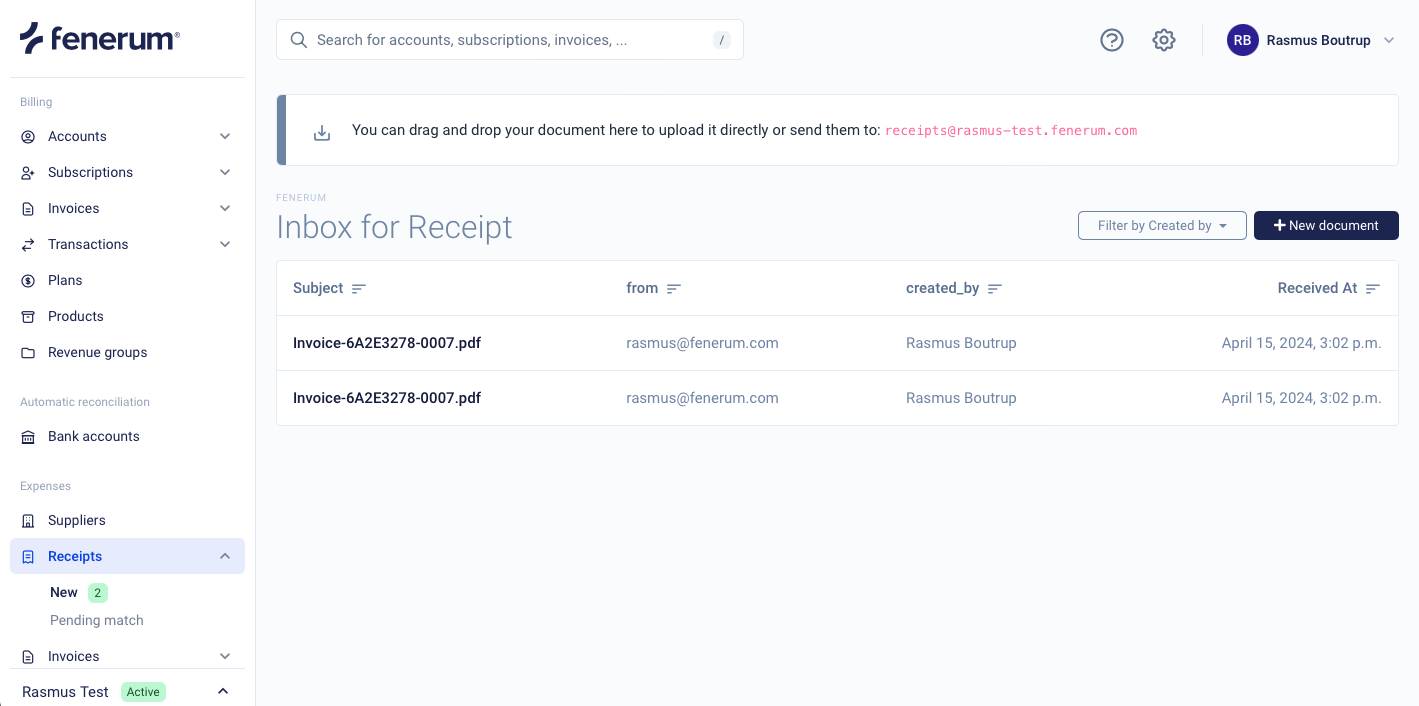
You can find your addresses by clicking on either receipts or invoices in the expense management section.
 NOTE: If you are using old e-mail address in form of <uuid>@app-receipts.fenerum.com this inbox will be treated as inbox for receipts.
TIP: You can provide these e-mail addresses to your suppliers so your receipts or invoices will be uploaded directly to Fenerum.
Create a supplier
When a document is being uploaded in Fenerum, the company automatic will be added to the list of suppliers.
How to add an expense account from ERP system to your supplier:
- Click on suppliers (Under expenses)
- Choose the supplier you want to add an expense account on
- Click on edit supplier
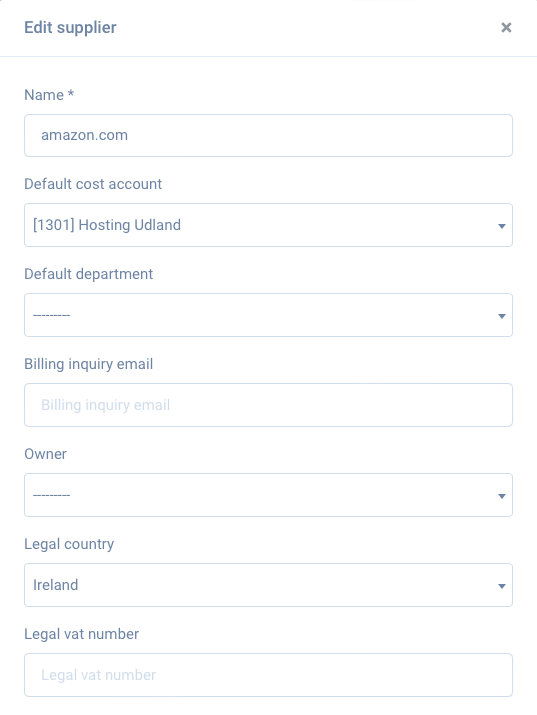
- Choose the default cost account on the drop down list
Example of a supplier with an expense account

Handling e-mails
Each document uploaded or sent via e-mail to Fenerum will be shown in the correct Fenerum expense "new" inbox. Fenerum tries to use OCR to parse your documents and extract important information, but this still requires some verification from human being. To verify receipts or invoice received via Fenerum go to the "new" tab under given tab in the "Expense" section.
 Here you will see all the things received via Fenerum on the given address.
Fenerum supports receiving receipts and supplier invoices as either PDF-attachments, image-attachments, or the email body. Below is a description on how Fenerum decides what part of the email to use as a receipt or supplier document.
- If the email contains any PDF-attachment, Fenerum converts each PDF-attachment to a receipt or supplier invoice
- If the email contains no PDF-attachment, Fenerum will convert the email-body, all text-attachments, and all image-attachments with a dimension larger than 400x500 (WxH) to a receipt or supplier invoice
NOTE: PDF is recommended way to send documents to Fenerum!
NOTE: 25 MiB is a maximum size for a single e-mail
Enrichment of the documents
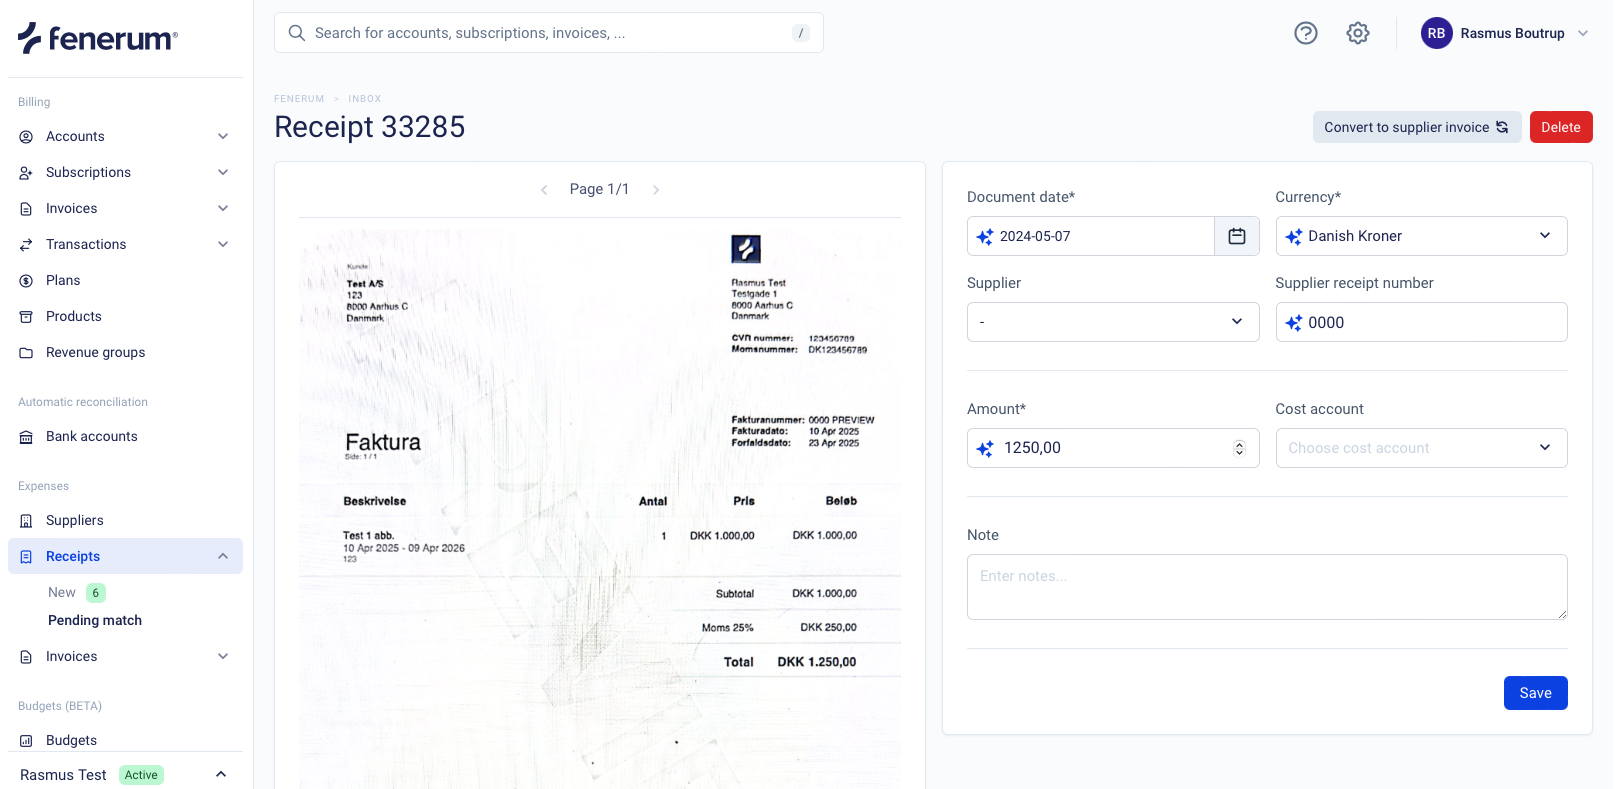
In case of the PDFs in the Inbox Fenerum requires you to verify values read by OCR. Clicking on the PDF document in Inbox will open an enrichment form.
 Here you need to provide all the data from the document to our system. If our OCR was able to extract some information from the PDF they will be shown below the field and you can click it to use given suggestion.
If for some reason document is in the wrong category (invoice/receipt) you can click "Convert to (the other type)" button to switch the type.
After saving the enriched document, the invoice needs to be approved before it will be moved to "Pending payment" or "Pending match" (depends on the type of the document) tab in the Fenerum.
Approval of an invoice
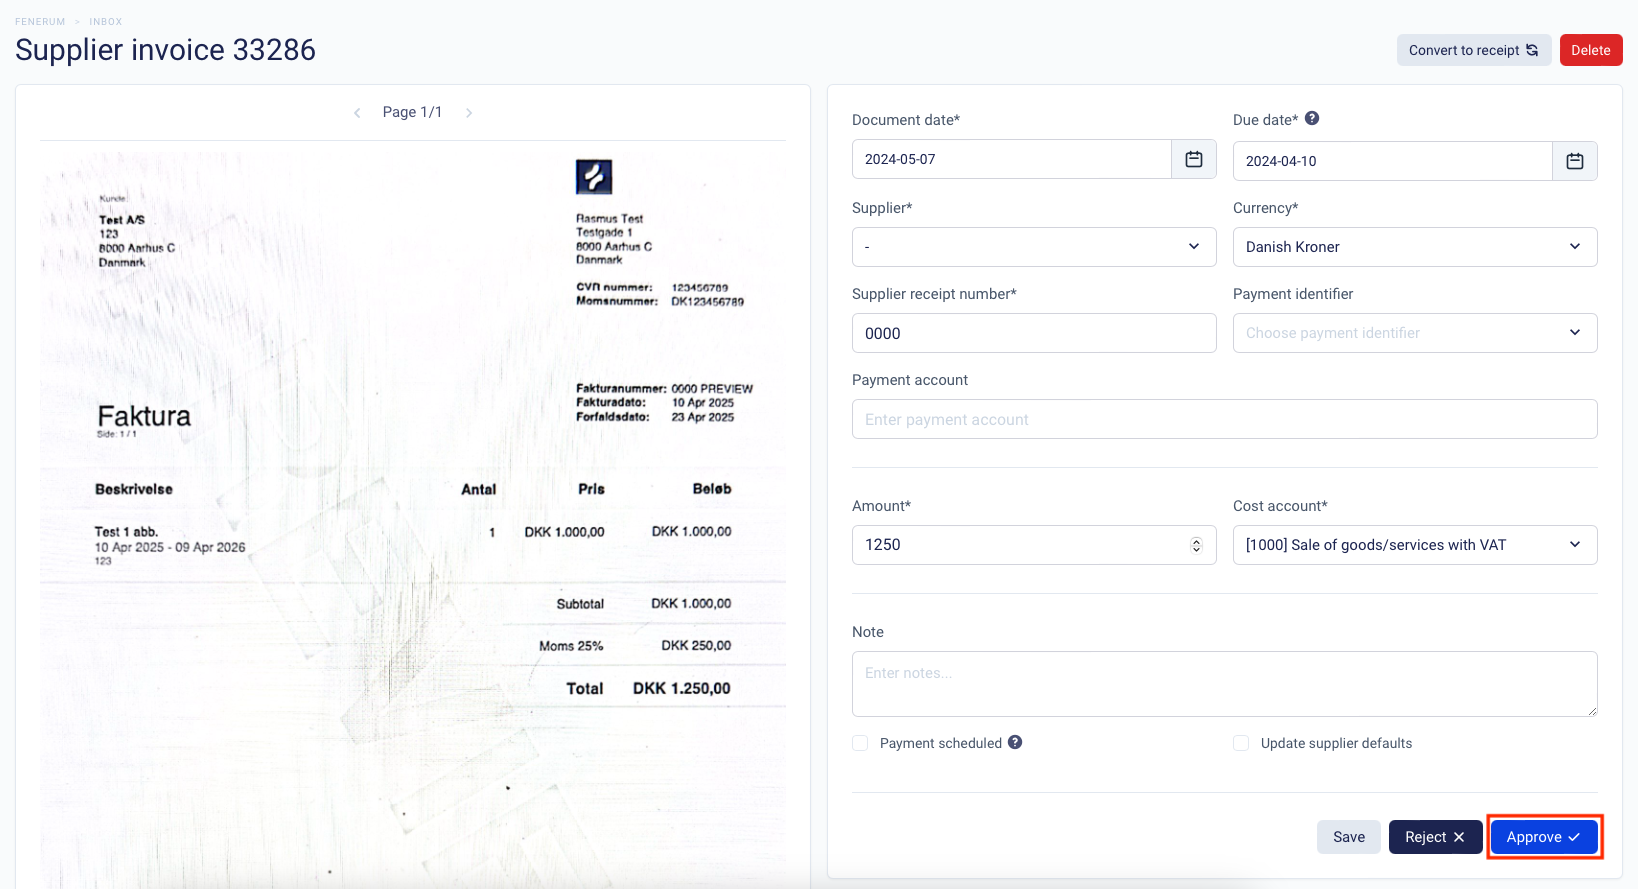
After the document has become enriched, the invoice will be moved to next step called pending approval. At this step a user with admin rights must approve it before it can be moved to "Pending payment" or "Pending match". The admin just needs to click on the Approve button - and then the invoice is approved and will be moved to pending payment.

Marking invoice as paid
Fenerum shows you an overview of the invoices which still requires payment and will show some alerts if payment is due. If you have already scheduled payment in your bank you can mark an invoice as "Payment scheduled".
To do so click on the button "Payment scheduled". Invoice will be marked as paid and waiting for match with bank account and you will be redirected to the "Pending payments" list to mark more invoices as already paid!
Verified receipts and invoices marked as "payment scheduled" will wait for matching them with the statment on your bank account to book them properly in the ERP.
Matching the document with the payment on the bank account
Last step in our expense flow is to match paid invoice or expense with the payment in your bank account.
When document matches with already existing line after enrichment you will be redirected directly to the page where you can book the expense.
In case that bank statement was uploaded after the receipt you will see on your bank account page that there is a receipt matching given bank account line.
 Just click a given entry to book the expense in the ERP.
If for some reason entry was not matched with your document you can still match in manually by clicking "Expense" link from the bank account line.
