E-conomic setup
When migrating subscriptions from E-conomic to Fenerum.
To connect e-conomic to Fenerum you need to go to "Integrations" tab under "Settings" and find "E-conomic integration" card. There you should find a button "Connect".
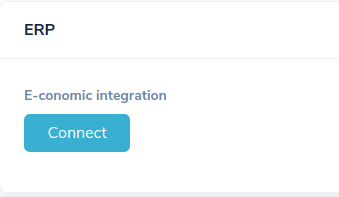 Clicking this button will forward you to the e-conomic website where you need to allow access to your account for Fenerum. After accepting it you will be forwarded back to Fenerum to setup import of the data from e-conomic. Fenerum needs to download your account plan and optionally can import your customers.
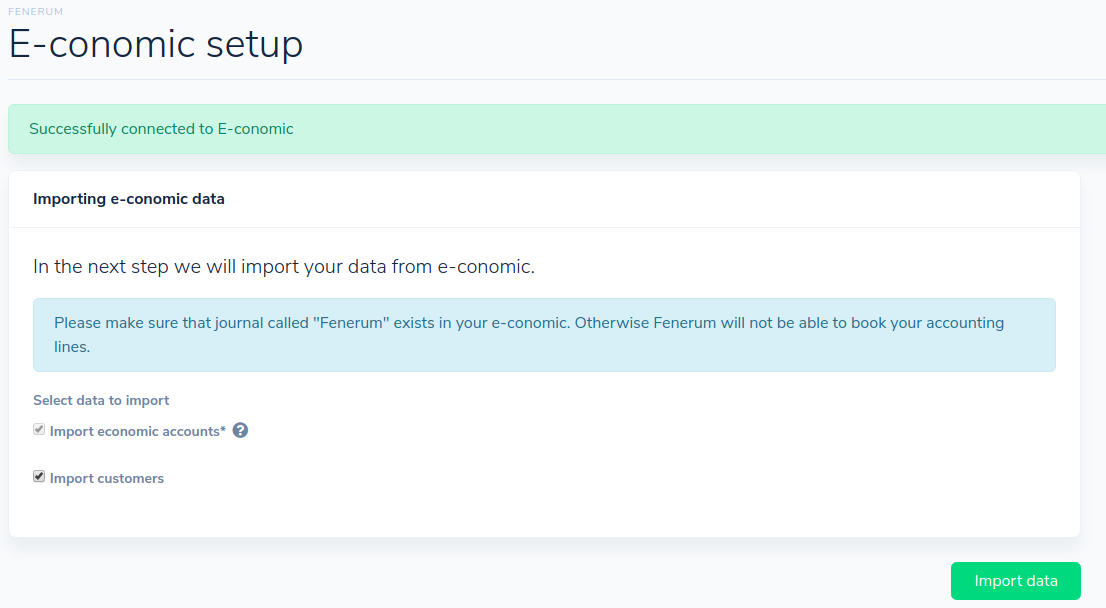 Please make sure you have a journal in e-conomic called Fenerum so Fenerum can write all booking lines there.
After importing data you will need to setup your ERP accounts settings for correct bookkeeping.
OBS: Be cautious while configuring that as wrong values will cause wrong booking lines in your ERP system!
In this screen you need to setup your account plan and some custom e-conomic settings.
How Fenerum books revenue is described in this guide.
For information about "Debtor settlement account" please refer to this guide.
Last secion of this page are settings for e-conomic defaults.
Fenerum does not use "Default customer group" and "Payment terms" from e-conomic but it need to set it up for every customer created in e-conomic. You can select here whatever suites you.
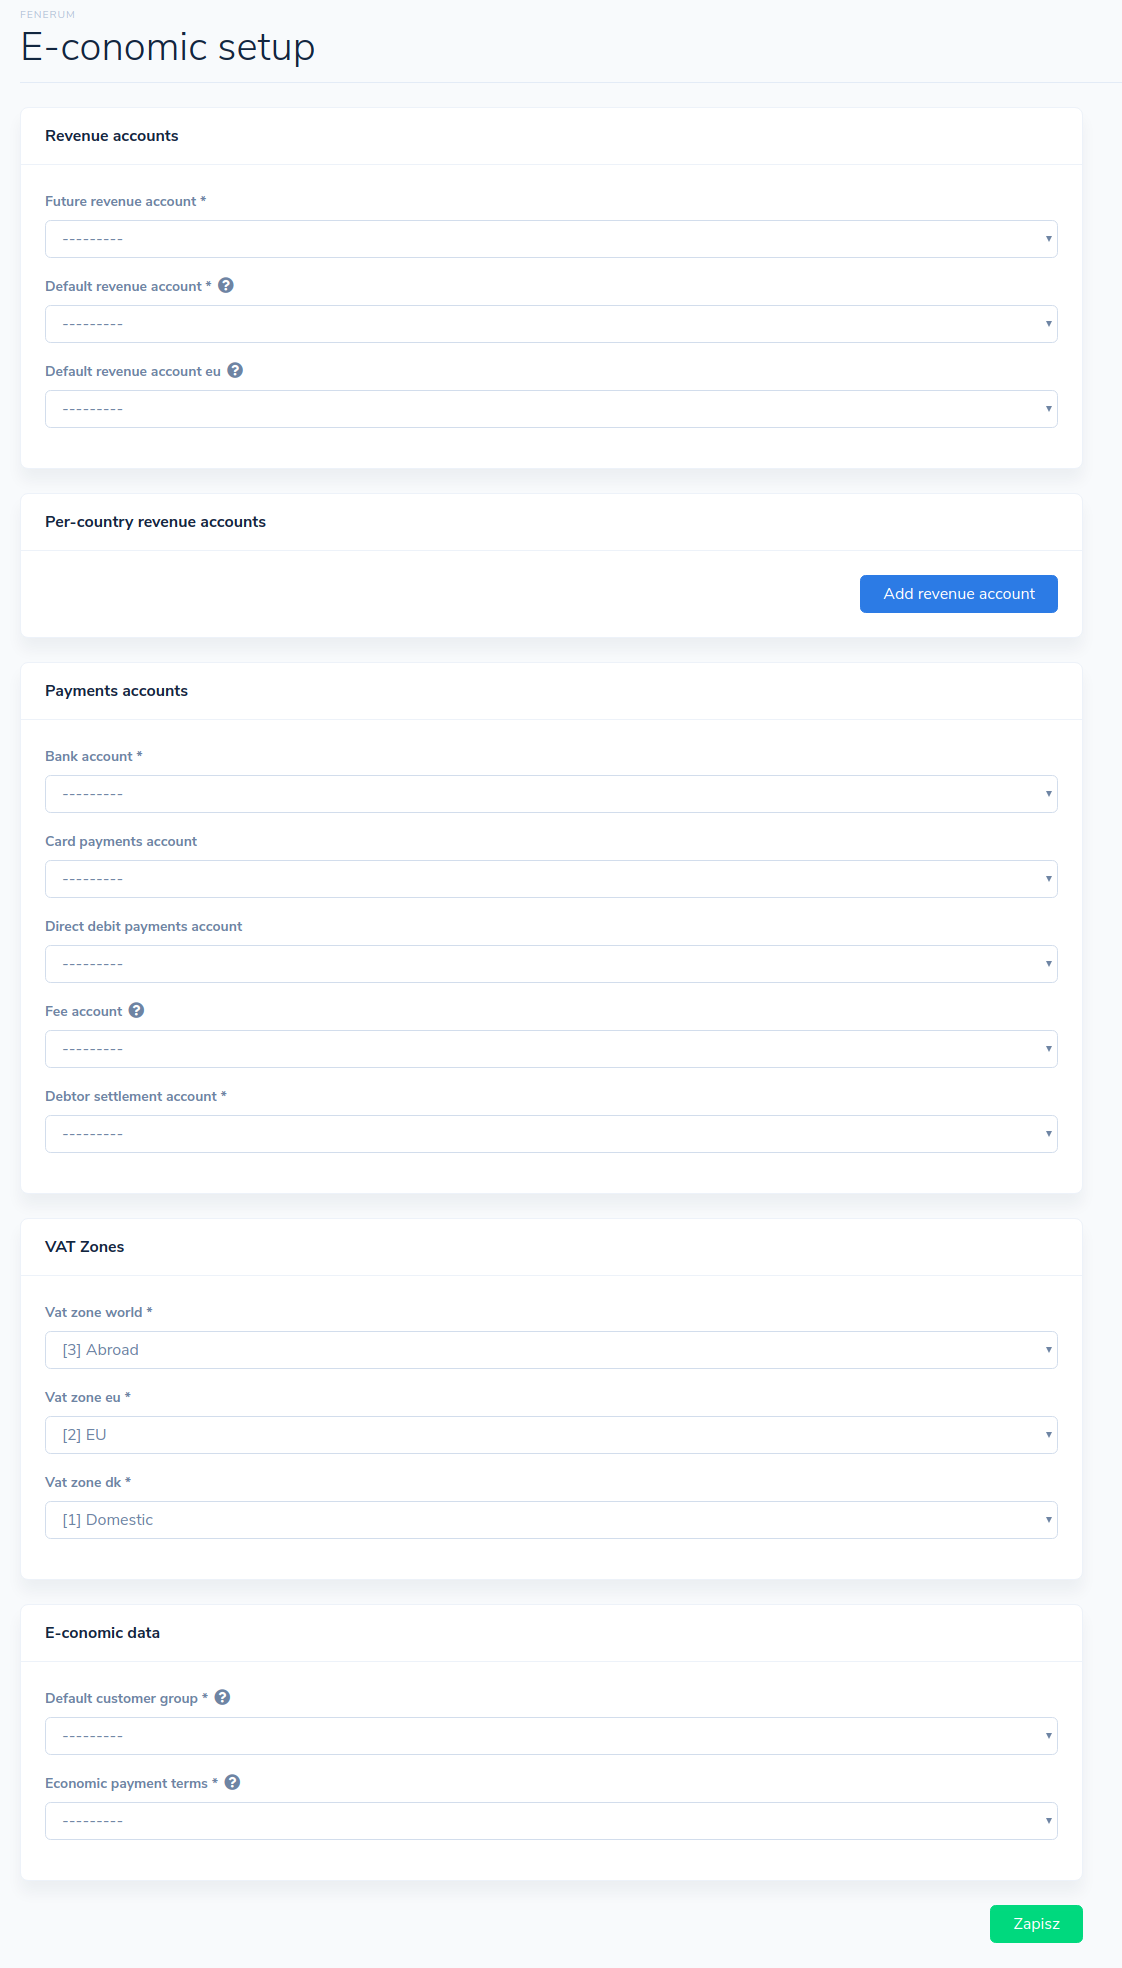 After clicking "Save" button Fenerum will ask you to once again review your settings.
If you confirm that the settings are correct and save them your e-conomic synchronization will be ready to use.
If you need to change this data or import new customers you can always go to integrations settings and start the same wizard again.
New: Import Transactions and Old Invoices
From now on you can choose to import invoices and transactions from E-conomic during configuration of integration.
You can choose one or both options on E-conomic configuration wizard during first configuration or later from integrations settings to perform import.
Imported transactions and old invoices will NOT result in new ERP lines.
Import Transactions
Process iterates through booked entries of type customerPayment from E-conomic and matches entries not originating from Fenerum to Invoices by invoice number. If entry is not related to any invoice by invoice number it will be matched to the oldest invoice.
For Fenerum generated Invoices this will be invoice number generated in Fenerum and for imported Invoices it will be external invoice number.
Before creating transaction we check if there is already Transaction created from this entry, if not new Transaction is created.
If account number on entry matches to ERP account number assigned to Bank Account this bank account will be related by Transaction.
Such Transaction will have type Payment, method Import and in notes there will be information that Transaction was imported from E-conomic with entry ID and entry text. Also badge with text "Imported from ERP" will be present there.
Import Old Invoices
Process iterates through all booked invoices from E-conomic and if invoice is issued for Account existing in Fenerum creates this Invoice in our system.
Account is matched using customer number from E-conomic, so Invoice is created if Account with corresponding debtor ID/ERP ID exists.
Such Invoice is marked as Imported (you can use Imported filter on Invoice list page) and it's Import source is ERP (you can use Import source filter on Invoice list page).
Invoice number from E-conomic will be set as created Invoice external invoice number.
For such invoice on Invoice detail page in status row there will be visible badge with text "Imported from ERP".
ERP line booking settings
This section contains ERP line booking settings specific for the E-conomic system. It can also contain some settings that are not described below. Those are settings that are common for all ERP systems. They are described here.
Automatically book ERP lines
If turned off, ERP lines are sent to your Fenerum Cashbook and you will need to book them manually in e-conomic. If turned on, the lines are fully booked automatically. Keep in mind that if you manually add entries to the "Fenerum" cashbook in E-conomic, those will get booked too as soon as a Fenerum generated entry gets booked.
Guide to Migrating Subscriptions to Fenerum
Set Up e-conomic Integration in Fenerum
Start by importing your chart of accounts and existing customers from e-conomic by following this guide
Export Active Subscriptions from e-conomic
- Go to "All Settings"
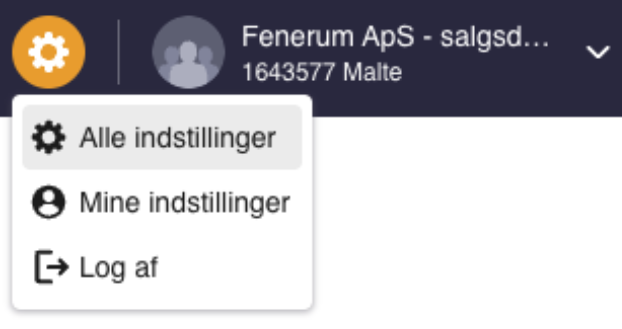
- Select Export Data – Download Lists Individually – Send Data.
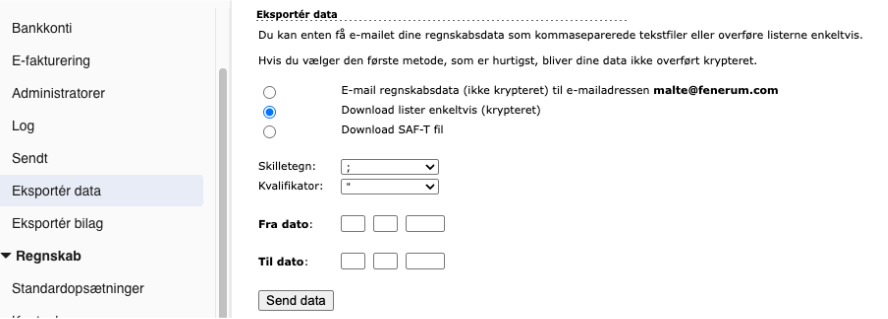
- Click on Abonnement.csv and you will receive a file containing your subscriptions.
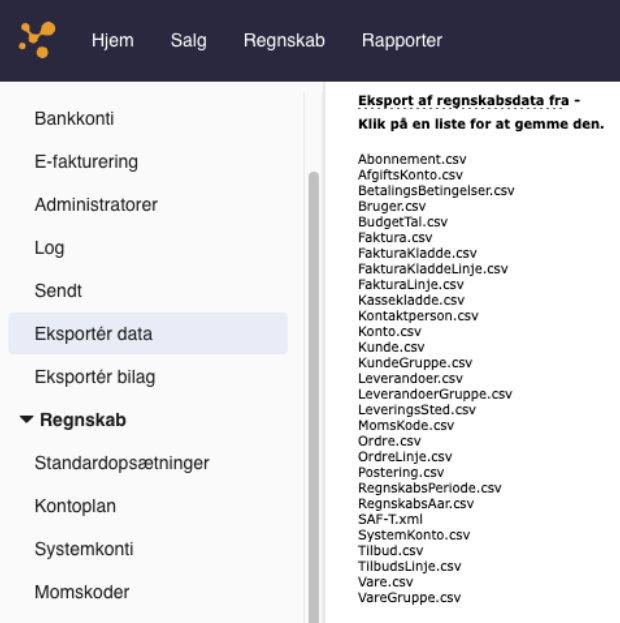
Prepare Excel Sheet for Upload
Download our Excel template for upload: https://app.fenerum.com/importers/documentation/subscription/
Convert Data from e-conomic to Fenerum Format Formatting requirements can be found where you download the template or can be seen below.

Feel free to send the file to support@fenerum.com if you'd like us to double-check that everything is correct.
Upload Subscriptions
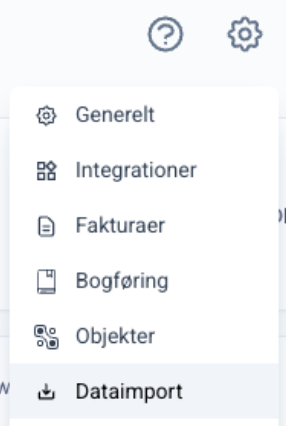
Go to Settings – Data Import
Select Subscription – choose the file and click Import Data.
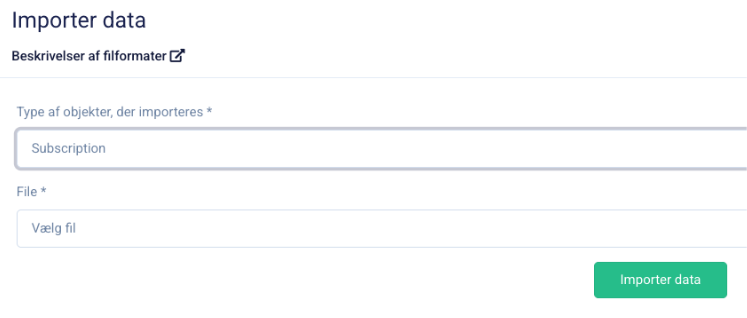
You can now see your subscriptions in Fenerum, and they will automatically become active on the selected start date.
Create Products in Fenerum
Make sure to create the plans (Items in e-conomic) in Fenerum before uploading active subscriptions. You can find a guide to creating plans and terms here
Remember that the term and the item in e-conomic must have the same ID.
Daily usage
Bank reconcilliation
Regnskab -> Bank -> Bankafstemning
- Lav alle kundeindbetalinger i Fenerum
- Hvis nødvendigt: Lav alle kreditor indbetalinger + kvitteringer
- Tryk "Afstem automatisk"
- Herefter tryk "Overfør" øverst til højre
- Du kan herefter gennemgå kassekladen som normalt
Salg til EU - Momsrapport
Hvis du bruger momsrapporten "Salg til EU" i e-conomic, skal du sikre, at din momsopsætning i e-conomic er korrekt opsat, så det fungerer sammen med Fenerum.
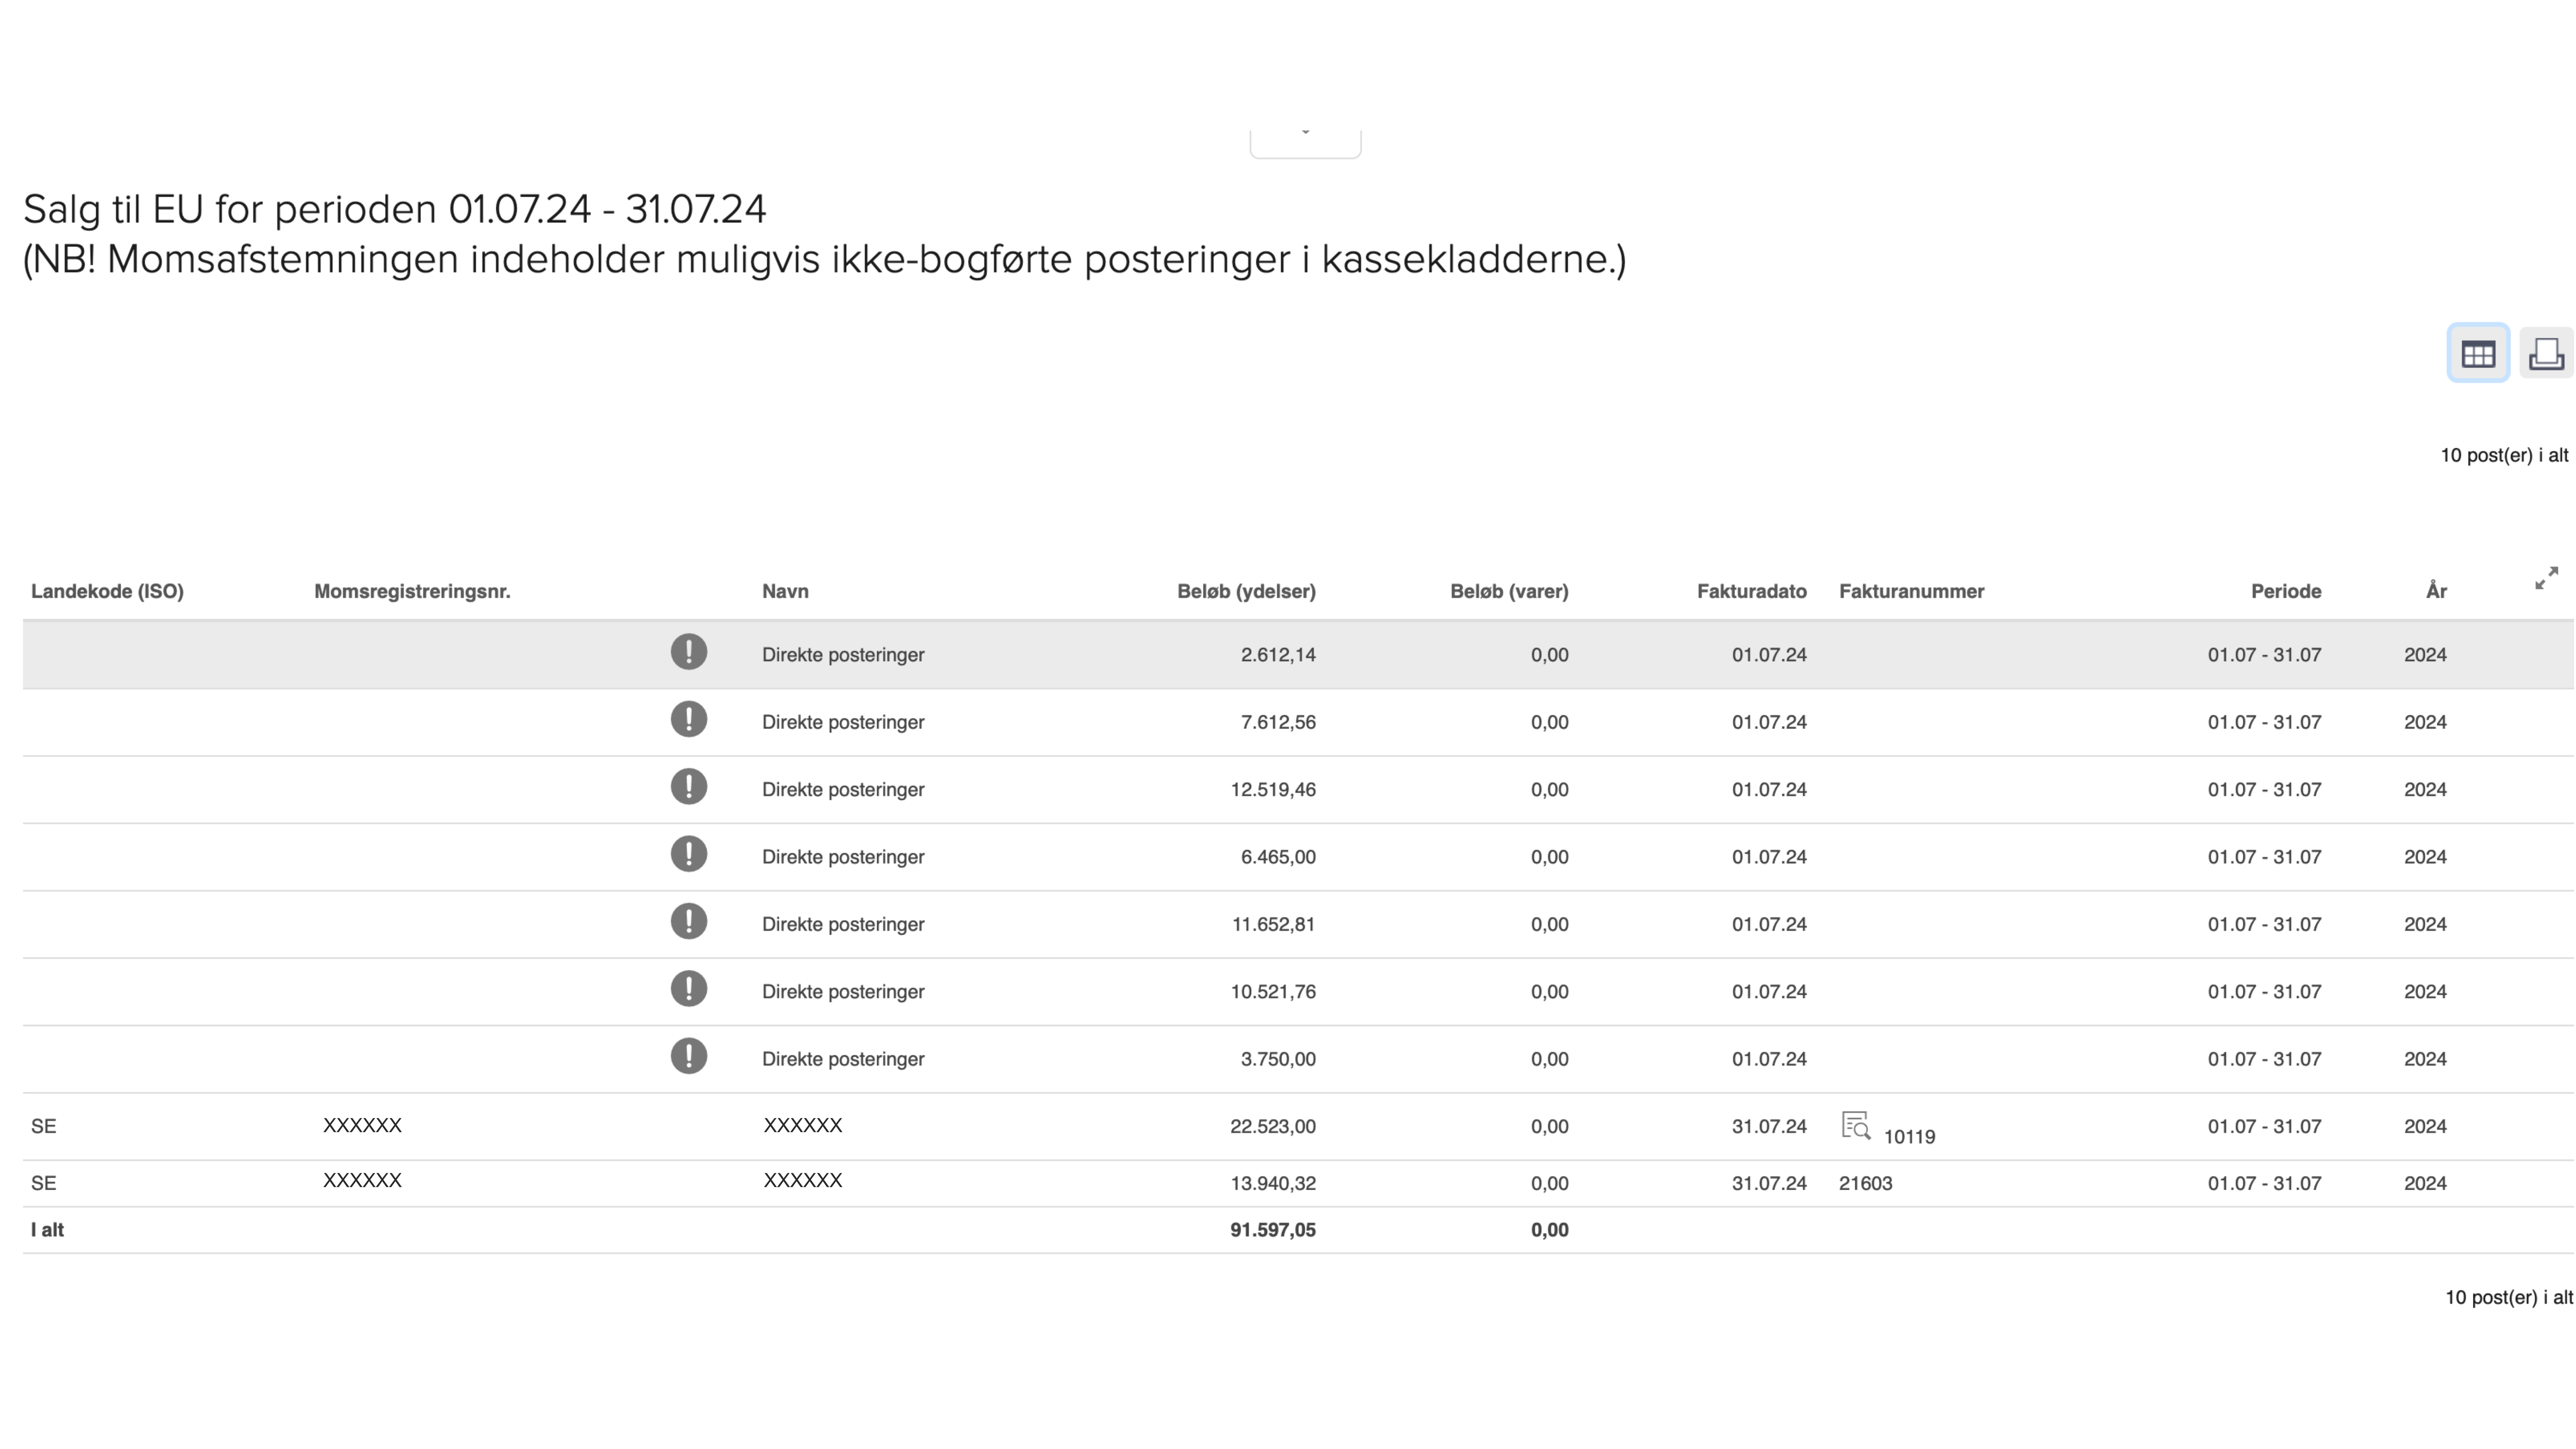
Det er vigtigt at konfigurere dette korrekt, da momsrapporten "Salg til EU" i e-conomic ellers ikke vil fungere som forventet. Her er et eksempel på, hvordan det kan se ud, hvis det ikke er sat korrekt op:
Sådan indstiller du momszonen på din kunde
- Tryk på fanen "Salg".
- Tryk på kategorien "Kunder" i venstre side.
- Tryk på "Kunder".
- I kundekartoteket kan du enten trykke på "Ny kunde" eller finde en eksisterende kunde i kartoteket.
- Hvis du opretter en ny kunde, kan du fortsætte til næste trin. Hvis du skal kontrollere en eksisterende kunde, skal du trykke på blyanten "Rediger" til højre ud for kunden, du vil kontrollere momszonen på.
- Kundens "stamkort" kommer frem ved oprettelse af en ny kunde, eller hvis du trykker på "rediger" på en eksisterende kunde.
- På kundens stamkort skal du trykke på fanen "Øvrigt" Her finder du øverst til venstre feltet "Momszone".
- Vælg nu den korrekte momszone for din kunde ved at trykke på listen og dernæst momszonen, EU (rubrik B).
- Tryk "OK" for at gemme.
Når dette er indstillet, vil momsrapporten "Salg til EU" i e-conomic blive udfyldt korrekt og være klar til indberetning.
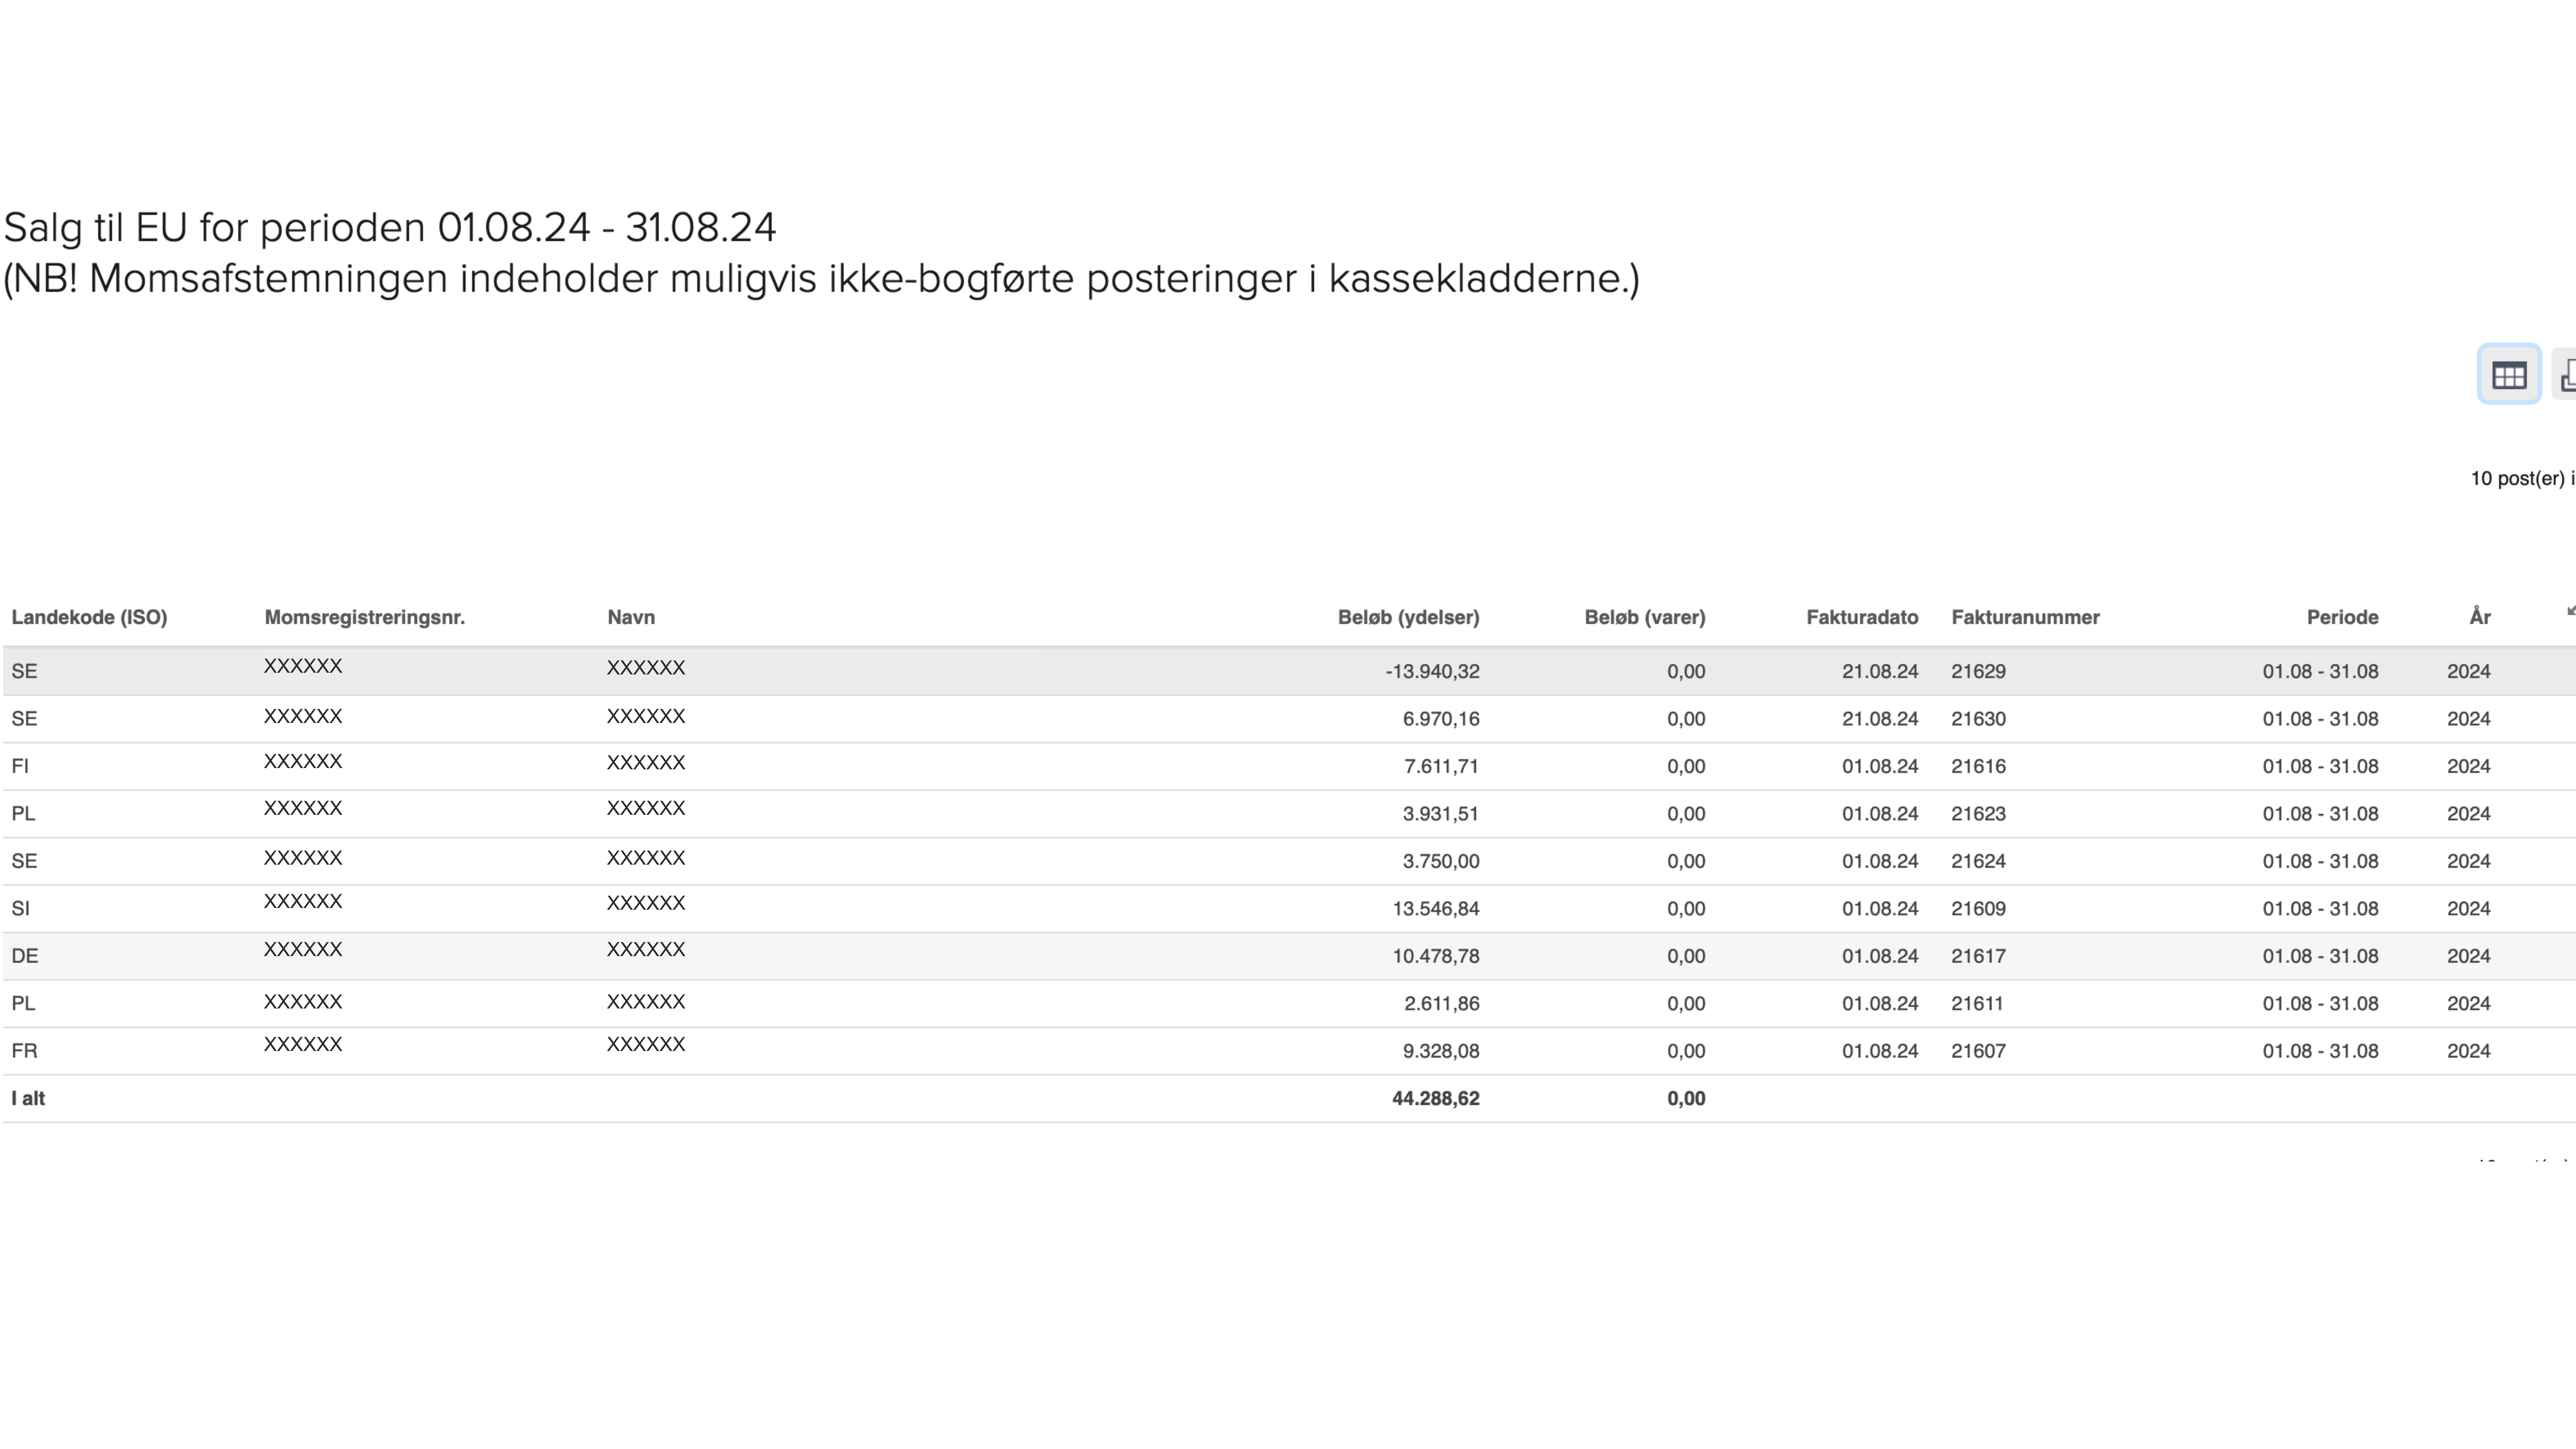 Dette er et eksempel på, hvordan det kan komme til at se ud.
